The One with the Thoughts of Frans

Archive for Linux

Why Windows Is Better Than PulseAudio

Wait, what? You heard me. On Windows you can set sample rates per sound card. It looks like this.

Setting one soundcard to 24 bit, 96 kHz in Windows. Windows refers to this as “Studio Quality.”

In PulseAudio you’re limited to a primary and secondary sample rate. I’ve actually been using pasuspender more, also because its AC3 passthrough never seemed to work.

CommentsTags: ,

Fix Minuscule Zoom Limit in Evince

I have plenty of RAM and a UHD monitor, but Evince sees it fit to limit zoom to under 200% in many a newspaper-sized document.


# get current cache size (defaults to 50?)
$ gsettings get org.gnome.Evince page-cache-size
uint32 50
# set it to something more reasonable like 500
$ gsettings set org.gnome.Evince page-cache-size 500

In smaller documents this makes pretty much the entire document exist in RAM, which eliminates loading nonsense while going back and forth in a document. Overall, a much smoother experience.

Just one page like this can already use up the 50 MB limit.

I understand the reason for the hard-coded default limit, but I have to wonder if there isn’t a more dynamic way of handling this. Say, either 50 MB or 2% of total memory.

Comments (1)

Adding “Search in Folder” to Thunar Custom Actions

Thunar is one of the best graphical file managers I’ve used, and I say that even while I own a Directory Opus license for Windows. I have some minor quibbles like very sparsely populated default actions on files and folders, but the biggest flaw is doubtless that the breadcrumb navigation doesn’t feature all of the regular folder interactions. In any case, in this blog post I intend to show how I improve on both Thunar and GNOME Search in one fell swoop.

I’ll start with a screenshot of the desired end result. You right click on a folder, and you’re presented with the option to search for files in it.

My context menu with Search for files.

In order to add this custom action, you’ll have to configure custom actions.

Edit → Configure custom actions.

Then you click + to add a new one, or you can edit an existing action.

Choose whether to add or edit a custom action.

You can type the name that will show up in the context menu, a little description for yourself, choose a fancy icon, and under appearance conditions you can choose whether this custom action applies to a specific type of files or folders. Unfortunately this dialog can’t be resized, but since you can copy and paste it’s not too bad.

gnome-search-tool --path=%f --contains=
The Edit Action dialog.

Finally, here is the result. Note that since I started gnome-search-tool with --contains=, the option to search for files containing specific text will show by default.

GNOME Search for Files (gnome-search-tool) with Contains the text expanded by default.

You can perform similar tricks with any of these other options.

$ gnome-search-tool --help
Usage:
  gnome-search-tool [OPTION...] - the GNOME Search Tool

Help Options:
  -h, --help                      Show help options
  --help-all                      Show all help options
  --help-gtk                      Show GTK+ Options
  --help-sm-client                Show session management options

Application Options:
  --version                       Show version of the application
  --named=STRING                  Set the text of "Name contains" search option
  --path=PATH                     Set the tet of "Look in folder" search option
  --sortby=VALUE                  Sort files by one of the following: name, folder, size, type, or date
  --descending                    Set sort order to descending, the default is ascending
  --start                         Automatically start a search
  --contains=STRING               Select and set the "Contains the text" search option
  --mtimeless=DAYS                Select and set the "Date modified less than" search option
  --mtimemore=DAYS                Select and set the "Date modified more than" search option
  --sizemore=KILOBYTES            Select and set the "Size at least" search option
  --sizeless=KILOBYTES            Select and set the "Size at most" search option
  --empty                         Select the "File is empty" search option
  --user=USER                     Select and set the "Owned by user" search option
  --group=GROUP                   Select and set the "Owned by group" search option
  --nouser                        Select the "Owner is unrecognized" search option
  --notnamed=STRING               Select and set the "Name does not contain" search option
  --regex=PATTERN                 Select and set the "Name matches regular expression" search option
  --hidden                        Select the "Show hidden and backup files" search option
  --follow                        Select the "Follow symbolic links" search option
  --mounts                        Select the "Exclude other filesystems" search option
  --display=DISPLAY               X display to use

Also see Finding Files on the Ubuntu wiki.

Comments (1)Tags: ,

Lossless Cut with ffmpeg

As another addendum to my notes on image optimization, here is how to cut a piece of audio or video as losslessly as possible with just ffmpeg on the commandline.

In this example we want the piece of audio from 1:30 to 2:00.

fmpeg -ss "1:30" -i audio-full.m4a -c copy -t "2:00" audio-cut.m4a

CommentsTags:

Skype on Android x86

A new Skype update was installed! Now “rebuilt from the ground up […] the best Skype we’ve ever built” (release announcement). Okay, cool. Let’s give it a go.

What’s that, a crash? And it won’t be fixed because I have the wrong kind of CPU? You can tell Google Play not to update the app by unchecking auto-update. Tap the three vertical dots in the top-right corner to bring up the option.

Uncheck auto-update.

Then download the old Skype Android app from AndroidDrawer.com (“Because Newer is Not Always Better”) or any similar site. Version 7.46.0.596 seems to be the most recent version which still works on x86.

Enjoy your Skyping. Or maybe just switch to Discord. It offers video chat now. Skype and I have had a decent run since ’04, but let’s face it, these past few years nothing good has happened. Take, for instance, the announcement last year that Skype for Linux was being updated again.

For example, you’ll be using the latest, fast and responsive Skype UI, you can share files, photos and videos and send a whole new range of new emoticons.

I have no idea what they intended by talking about “responsive UI”. The supposedly retired version 4.3[1] scales along just fine with DPI thanks to it being Qt-based. I guess they hope that by just tossing out random terms I won’t notice the old version already does all the things they’re boasting about. Well, except for those emoticons. Big whoop.

What’s my ICQ number again?

[1] “Important notice: All Skype for Linux clients version 4.3 and older will be retired on July 1, 2017. To keep chatting, please install the latest version of Skype for Linux.”

Comments (1)Tags:

Changing the Android Default Alarm on Zenfone 2

I don’t like the default alarm sound on my phone much and apparently changing it to something a little bit gentler can only be done on a per-alarm basis. Luckily I found this:

Today I was looking for a way to change the sound that is applied by default to new alarms you create in the Alarms app. After quite a bit of effort I came upon the following procedure:

  1. Install ES File Explorer
  2. Open it and select / from the Favorites
  3. Browse to /system/media/audio/alarms
  4. Click on the file you want and in the "Open with" prompt select "ES Media Player"
  5. Click on the bell beside the file name, pick "Set alarm" and click OK

Should you choose to change again the default, you may notice that the defaults you pick will appear in the music library. Also, they will be listed twice in the tone selection list which appears when you manually change the tone of an individual alarm.

You can fix that with the following steps:

  1. Open Settings
  2. Go to Applications > Manage Applications > All
  3. Click on Media Storage and then Clear data
  4. Reboot your phone
  5. You will now have to set your new default sound

(I've noticed that sometimes, when you view a music album which doesn't have a cover art image and add an album.jpg file to it later, Music Player will not use that file for the cover art. The above steps, as a side effect, will make Music Player look for images for all albums, thus having the cover art of all your albums updated.)

Hope this helps 🙂

The ASUS Alarms app.

Comments

You Can Just Concatenate MPEG-2

To deal with the inferior FAT file system, it would seem that consumer-level Sony video cameras write video files of a maximum of about 2.1 GB. A sensible approach, but annoying to work with. Luckily they can be concatenated without any concerns or side effects for easier viewing and editing.

cat 00006.MTS 00007.MTS 00008.MTS > output.mts

For other video formats, see the ffmpeg FAQ.

CommentsTags:

Launcher with parameters in Xfce

Back in November I decided to try Aard 2 on my laptop. I followed the instructions and it worked. Then I created a launcher with the following command and suddenly it did not.

java -Dslobber.browse=true -jar ~/programs/aard2/aard2-web-0.7.jar ~/programs/aard2/slobs/*.slob

A different strategy, passing a command to Bash, did the trick.

bash -c "java -Dslobber.browse=true -jar ~/programs/aard2/aard2-web-0.7.jar ~/programs/aard2/slobs/*.slob"

Enjoy your fully functional launcher! 😉

CommentsTags: ,

Qalculate!, My New Favorite Calculator

Over the past few years I acquired a bad habit of using search engines for basic calculations and conversions. I’m not talking about the stuff you should just do in your head — not quite that bad, but about the fact that several Linux distros, including my favorite of Debian Xfce, don’t seem to ship with a calculator by default. So I finally got around to testing some programs and Qalculate! does all I want. You can install it on Debian using sudo apt install qalculate-gtk. There’s a list of features on the website. Enjoy a few screenshots.

Celsius to Fahrenheit.
Kilometer to mile.
Euro to Dollar.

I hope you’ll like it too!

CommentsTags: , ,

Image Optimization Guide

On the forum I administer, I am forced to run a tight attachment policy. Disk space doesn’t grow on trees. Occasionally this leads to questions about the small attachment size limit of 50 KiB. This guide is intended to clarify that this is not nearly as tiny as you might think. Note that although I’ll mention commands without much explanation for the sake of brevity, you’re always recommended to further explore the possibilities offered by those commands with the --help flag as well as by running man the-command-here.

First you need to ask yourself what kind of file type is appropriate, if you have the choice. On screenshots, the main purpose of attachments on my forum, you’ll often encounter large areas of uniform background colors. PNG is therefore almost invariably the right choice. Crop out everything but what’s relevant. JPEG is appropriate for more dynamic pictures such as photographs. If you want to do a lot with photographs, you might want to consider an external hosting service. My wife likes SmugMug. Still, for thumbnails you might be able to do a fair bit more within a few hundred KiB than you might think. Finally, the vector graphics in SVG result in pictures that always look sharp. You’ll typically have drawn these in a program like Inkscape or Adobe Illustrator.

Table of Contents

  1. 1. Optimizing JPEG
  2. 2. Optimizing PNG
  3. 3. Optimizing SVG
  4. Addendum A: Scanned Documents
  5. Addendum B: Video

1. Optimizing JPEG

Often you’ll want to crop your file. Do not edit your JPEG followed by resaving it because this will result in reduced quality! You can crop losslessly with cropgui. On Windows you can use IrfanView.

If you don’t want to crop, and also potentially for some post-cropgui optimization, use jpegtran -copy none -progressive -optimize file.jpg > file-opt.jpg. Note that this will get rid of all metadata, which may be undesirable. If so, use jpegtran -copy all -progressive -optimize file.jpg > file-opt.jpg.

Of course if you want to scale down your JPEG there’s no point in mucking about with lossless cropping first. After scaling down, check how low your quality can go (also see a little helper script I wrote). In any case, you should avoid introducing any unnecessary compression steps with associated quality loss. Here are some results:

  • The original 11.jpg at 2.19 MB.
  • Losslessly cropped 11-crop.jpg at 1.11 MB.
  • Optimized with -copy all -progressive -optimize 11-crop-opt.jpg at 1.04 MB. -copy none would’ve saved an extra whopping 40-some KiB, which on this kind of filesize has little benefit, and besides, I quite like the metadata. For thumbnail-sized files the balance is likely to be different. For example, the 52.2 KiB SmugMug auto-generated thumbnail below can be insignificantly reduced to 51.1 KiB with --copy all, but to 48.2 KiB with --copy none. I think an 8% reduction is not too shabby, plus it brings the file size down to under the arbitrary 50 KiB limit on my forum.

2. Optimizing PNG

As I wrote in the introduction, for screenshots PNG is typically the right choice. If you want to use lossless PNG, use optipng -o7. In my experience it’s ever so slightly smaller than other solutions like pngcrush. But as long as you use a PNG optimizer it shouldn’t much matter which one you fancy. Also see this comparison.

If you don’t care about potentially losing some color accuracy, use pngquant instead. To top it off, if you really want to squeeze out your PNG, you can pass quality settings with --quality min-max, meaning you can pass --quality 30-50 or just --quality 10. Here are some quick results for the screenshot in the SVG section below, but be sure to check out the pngquant website for some impressive examples.


$ du -h --apparent-size inkscape-plain-svg.png
27K	inkscape-plain-svg.png

$ du -h --apparent-size inkscape-plain-svg-fs8\ default.png 
7.6K	inkscape-plain-svg-fs8 default.png

$ du -h --apparent-size inkscape-plain-svg-fs8\ quality\ 10.png 
4.3K	inkscape-plain-svg-fs8 quality 10.png

In this case there is no visual distinction between the original PNG and the default pngquant settings. The quality 10 result is almost imperceptibly worse unless you look closely, so I didn’t bother to include a sample.

3. Optimizing SVG

For using SVG on the web, I imagine I don’t have to tell you that in Inkscape, you should save your file as Plain SVG.

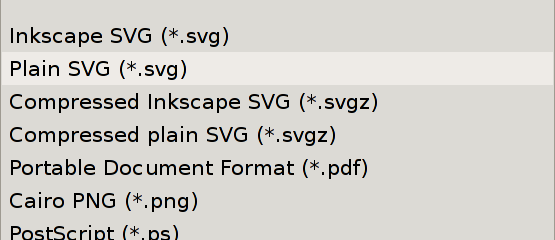
Save as Plain SVG in Inkscape.

What you may not know is that just like there are lossy PNGs, you can also create what amounts to lossy SVGs. There are some command-line tools to optimize SVGs, including (partially thanks to this SO answer):

  • Scour is probably the best command line tool for some quick optimization. You can just use the defaults like scour < in.svg > out.svg or scour -i in.svg -o out.svg. But I recommend you go further.
  • SVGO (SVG Optimizer)
  • SVG-optimiser (by Peter Collingridge)
  • SVG-editor (by Peter Collingridge)

My personal preference for squeezing out every last byte goes toward the web-based version of the SVG-editor by Peter Collingridge. By running it in a browser with inferior SVG support such as Firefox, you’ll be sure that your optimized SVG still works properly afterward. The command line tools can only safely be used for basic optimizations, whereas the effects of going lossy (such as lowering precision) can only be fully appreciated graphically.

Addendum A: Scanned Documents

Scanned documents are a different item altogether. The best format for private use is DjVu, but for public sharing PDF is probably preferable. To achieve the best results, you should scan your documents in TIFF or PNG, followed by processing with unpaper or ScanTailor. If you’ve already got a PDF you’d like to improve, you can use pdfsandwich or my own readablepdf.

Addendum B: Video

I’m not aware of any lossless optimization for video compression such as offered by jpegtran, but you can often losslessly cut video. In the general purpose editor Avidemux, simply make sure both video and audio are set to copy. There is also a dedicated cross-platform app for lossless trimming of videos called, unsurprisingly, LosslessCut. If you do want to introduce loss for a smaller file size you can use the very same Avidemux with a different setting, ffmpeg, mpv, VLC, and so forth. You can get reasonable quality that’ll play many places with something like:

ffmpeg -i input-file.ext -c:v libx264 -crf 19 -preset slow -c:a libfaac -b:a 192k -ac 2 output-file.mp4

For the open WebM format, you can use something along these lines:

ffmpeg -i input.mp4 -c:v libvpx -b:v 1M -c:a libvorbis output.webm

More examples on the ffmpeg wiki. Note that in many cases you should just copy the audio using -acodec copy, but of course that’s not always an option. Extra compression artifacts in audio detract significantly more from the experience than low-quality video.

Comments (2)Tags:

« Newer EntriesOlder Entries »